Kitchen Mini Reno

This post is a flashback, of sorts. Back when we first bought the house I knew the kitchen was going to be a project, and was perhaps partly why the home sat on the market for a year. After living here for a few months with some simple updates, I finally went for a Stage One type update. Low budget, low skill-requirement, huge results.
Here are some "before" photos of the kitchen from the day we did our inspection.

The previous owners had a kitchen cart next to the stove. This very small table and chairs definitely made me wonder. Their family was small: two adults, one toddler. Even so, I am not too sure how functional this really was for them.
If you've read my dining room post, I point out a few things in that room that we ended up doing, exactly, too. We have a clock RIGHT there, too! Very unintentionally. I think its kind of funny how a house can work the same for different people.

The green formica countertop made me all kinds of sad. Also, the bare bulb above the sink. #sadtrombone
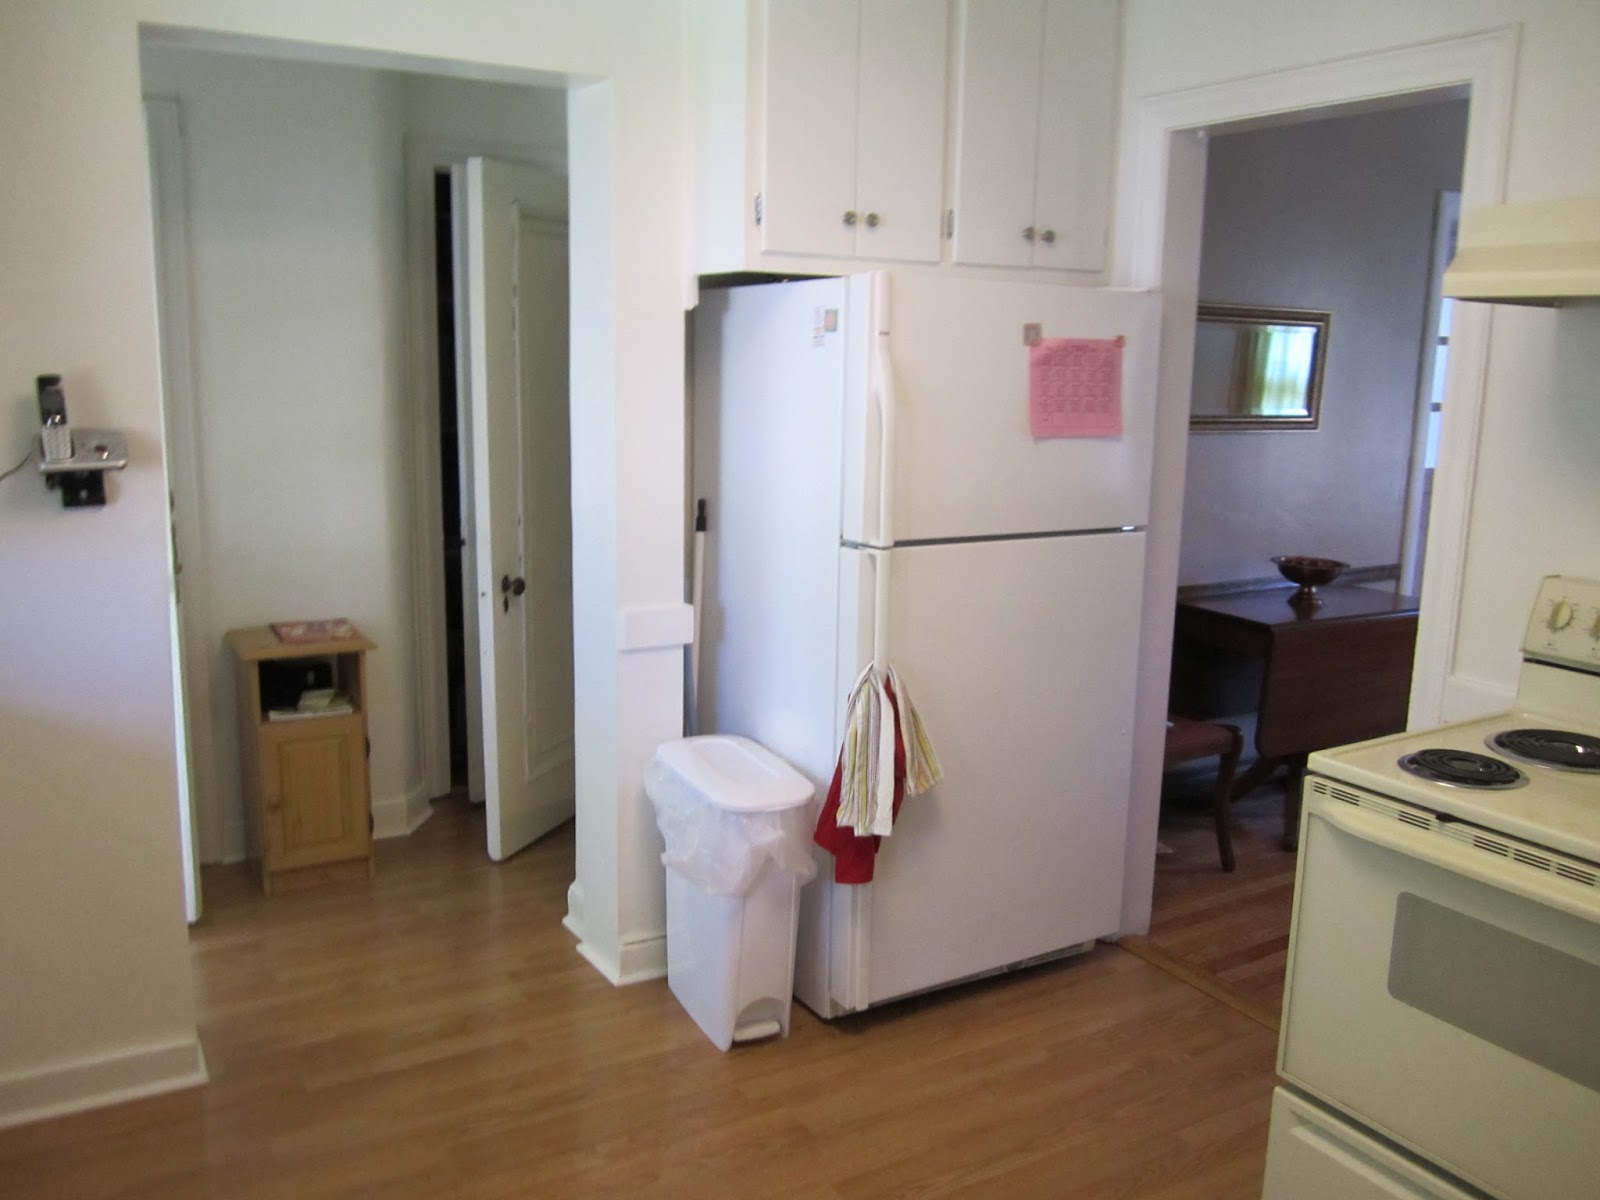
I really didn't like how the refrigerator sort of stuck out into the doorway past the moulding. (So one day while my husband was at work I just moved it next to the stove!)

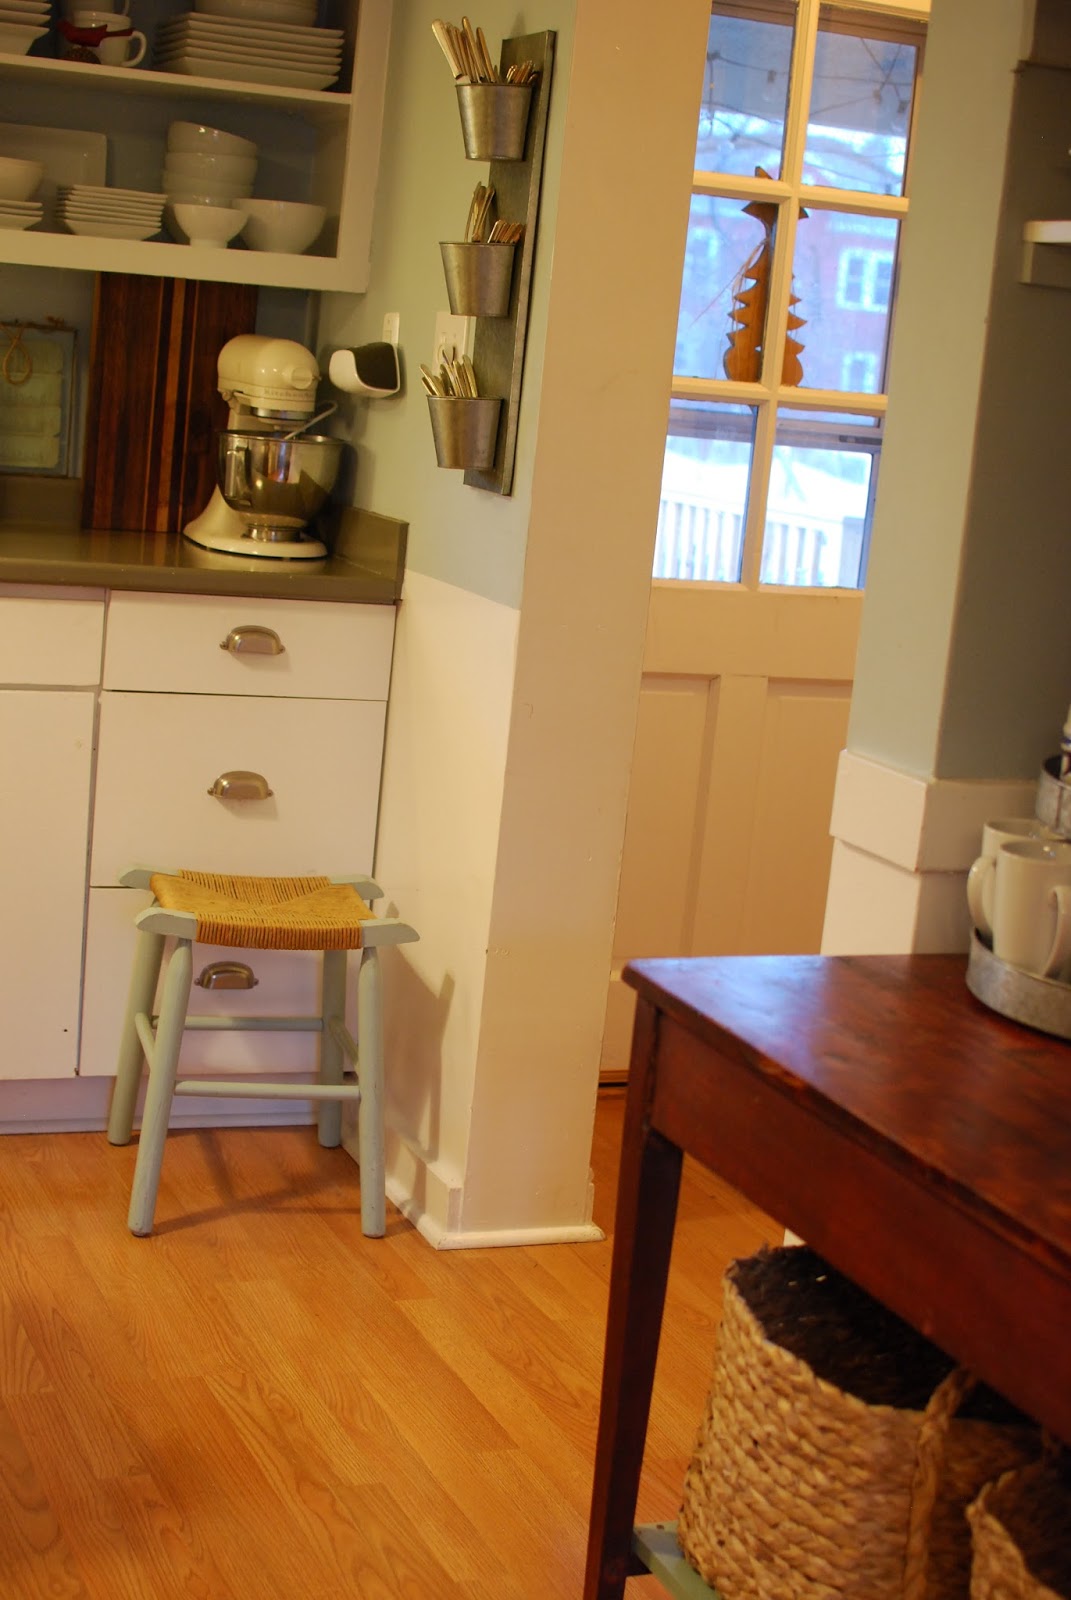
This window faces north and provides some evening sun in the summer, but very indirect the rest of the time. There is an overhang from the deck to the garage door, which also makes it darker. We're keeping that in mind with some of the finishes we're picking for our upcoming renovation.

We added an "island" right away, and it has had a few versions, the above being the latest. We also used a bakers rack with this cutblock on it, and the farm table that is now in the "coffee bar nook." We are loving this latest! It is a rustic cupboard that we used previously for under our television. This is WAY better. (and the new solution for our media stand is working out WAY better, too) I'm a big fan of "shopping your own home" like that!

(Some of our white dishes were in the dishwasher today so the bottom shelf looks a little empty.)

I repainted the cabinets (same white, just a fresh coat) and in the process of having all the doors off, realized I really loved the open-shelf look! I saved the doors in case I changed my mind, but it has been four years, so things are looking good for open shelves.

I added this shelf in front of the window to add some farm-y charm. The moulding supporting the shelf is original from the house, taken down to replace a window, we think. We found a simple glass shade to cover the bare bulb. Eventually we'd like to take out the soffit above the cabinets and do a new light on a real switch. For now, this adds some needed task light, and the pull chain we added is functional!
I recently took a lot of the things that were on this shelf off to try and simplify the look. Especially since the window is the only one in the room, covering it up at all seems silly.

My collection of milk glass vases.

The ducks. Mr Puddleduck, and Little Duck.

I picked up that adorable turned wood lamp at an estate sale. I think it makes the room extra cozy. I love the ambient light.

We updated the light as well. I don't have any photos of the original fixture. I'm quite certain I didn't want to remember it: a large square flush mount fluorescent monster. Hideous. We originally swapped it with a nickel and white glass shade chandelier. We decided we wanted to go in a more industrial direction with this budget friendly HEKTAR pendant from IKEA. I love it. We also installed a dimmer switch which adds another level of lighting ability for practically free. A super easy DIY.

This gallery wall adds so much character and warmth to the room. I wrote about it here. I also painted above the chair rail in Benjamin Moore's Yarmouth Blue from the Historic Collection. I painted the inside of the upper cabinets, too.

This is an old iPhone photo from just after I painted the walls. (still working on touch-ups with green tape up there.) This was the first light fixture we had, as well as the baker's rack with the cutblock on top. I hadn't put up the shelf across the window yet. Hmm. Maybe I should go back to that.

Another relatively inexpensive update was changing the hardware. I'm a huge fan of cup-pulls/bin pulls. They speak to me. I re-used the hinges, and of course, by taking down the top cabinet doors, needed to replace less hardware overall. All of the hardware I used was the Martha Stewart line from Home Depot: Cup Pull in Bedford Nickel, Cabinet Knob in Bedford Nickel. I'm glad they still sell them, because we need a few more with our kitchen update!


Storage is a challenge in most homes. We love the (mostly hidden!) storage this adds! Our toaster is down here to save counter space. The baskets hold extra towels, oven mitts, place mats, and even the "downstairs diapering supplies." I moved my favorite nesting bowls here, too, because I use them very often, and they are unbreakable. We still have a toddler here, after all!


A little country charm: a bottle opener. I also use the window ledge to keep things handy that I use a lot. Those little colorful bowls, and pyrex glass bowls are used constantly! I blogged about the mason jar soap dispenser here.

For the sad countertops I tried a product from Rust-Oleum that you paint on. I wouldn't necessarily recommend it for a long term solution. For our purposes it achieved the result I was hoping for: no more green!! It hasn't been super durable AT ALL. I had to paint it several times, as well as seal it with polyurethane. Despite all those efforts, it has chipped A LOT and drives me pretty crazy. I went with this grey color to mimic a concrete countertop...or even give me the idea of what a darker stone like soapstone would be like. The verdict: we need to go lighter. We are considering carrera marble and butcher block.

We had to replace the refrigerator and found this Samsung french door, bottom drawer freezer for a great deal. This is an amazing fridge. You might not think about it, but when you have a baby on your hip and need a bottle, a top fridge is so much easier than a traditional one. The bottom freezer is convenient and holds a ton!

Say hello to my bisque electric stove. She functions. (And doesn't actually look too terrible in this photo!) We clearly plan to update to stainless (and gas) here if/when the need comes, or this spring. Whichever comes first. The matching bisque dishwasher is also on limited time. I also think we are going to suck it up and get a micro-hood. There is no other really great option for us. It can't go on the counter. Nope. Not doing that. We had to rule out a built-in in the lower cabinets because it would take up too much storage for other things. I thought about sticking it in our pantry, but I'm worried it won't have enough ventilation. So micro-hood, I guess. Sigh. I wish I could live without one. But: microwave popcorn.

Another old iPhone photo shows the original white refrigerator and the first version of the "island."

The island makes a great spot to set things from the fridge and stove...its a great work space and adds so much function.

This nook where the refrigerator used to be has become a hardworking space for sure! I added a shelf for some extra open storage. It was a coffee bar until quite recently. In our upcoming renovation the coffee maker will come back here so in my mind it is still the "coffee bar." Our plan is to have cabinets with a butcher block counter. For now, this farm table with baskets beneath for returnables and recyclables works hard for us!

The cabinets above have a ton of great storage. I have three crockpots up there! And a panini maker! And other stuff! I'm not getting rid of those cabinets, for sure.

In this older photo you can see we had the toaster and microwave under the table. It didn't function very well at all. Hi, Cooper.


So there's my mini renovation! It's Phase One of three phases. Our next phase (next month!) is new flooring, new lower cabinets, sink, faucet, countertop, backsplash, dishwasher, and stove. It's a big phase. Phase Three will hopefully be removing the upper cabinets on the sink side and going subway tile all the way up with deep (true) open shelves, getting rid of that soffit, better lighting there, and adding upper cabinets over the refrigerator and stove. We can't believe how much of a change Phase One has been, and know Phase Two is going to be a game changer. Phase Three might not even need to happen! Just kidding. I hope you found some good ideas and inspiration from our Phase One facelift/mini reno! Thanks for reading!! As always, you can follow me for daily updates on Instagram!
xoxo jamie
You are so creative with different pieces of furniture! Always moving things from other rooms! I'm inspired!
ReplyDeleteSpeak to me about the tiered lazy Susan at your coffee station. Where would an admirer find one?
ReplyDeleteHi Kristie! It's from Pottery Barn, they no longer sell this exact one, but have another one that is possibly cuter! Here's the link http://www.potterybarn.com/products/galvanized-metal-rivet-tiered-stand/?pkey=e%7Cgalvanized%2Btiered%2Bstand%7C1%7Cbest%7C0%7C1%7C48%7C%7C1&cm_src=PRODUCTSEARCH
Delete