Entryway Progress

We have been quietly updating our front entryway since October. I say quietly because I haven't shared much throughout the process on Instagram. It was a sort of surprise project. We had always talked about updating this area to make it more functional but both were scared that we would find that the little addition would need expensive repairs...and you never know what you'll find behind the walls of an old house. During the winter we always had to seal off this off and use curtains to keep the drafts out of the house. We really wanted to get it insulated, beef up its charm, and add functional storage.
It all started when I said "it's just too bad we can't get that front entry properly insulated before winter gets here this year." I remember I was sitting at the dining room table on a sunny October day. Reagan was napping. I continued and said "I mean, I wonder what's behind that dry wall. Is it even insulated at all?? I wonder if we just cut a little out behind the dresser where you can't see...." and so we started....and within an hour or so my husband was completely gutting it.


This hall light didn't have a dome on it because the door would hit the dome when you opened it. <EYE ROLL EMOJI> It also only could be on if the front light outside was on. <2 EYE ROLL EMOJIS> Early on living here I dreamt of vaulting the ceiling.

The drywall was cracking and just not cute.

We pulled up the top layer of flooring and found that the flooring was not level. It was running up to the home's original threshold and that was causing the door to catch on the floor. We were quite relieved at that, because we had been worried the floor was buckling due to a foundation issue.

Well, behind our little hole we found some insulation, which only caused Dave to keep tearing. If there was insulation, why was it always cold???!


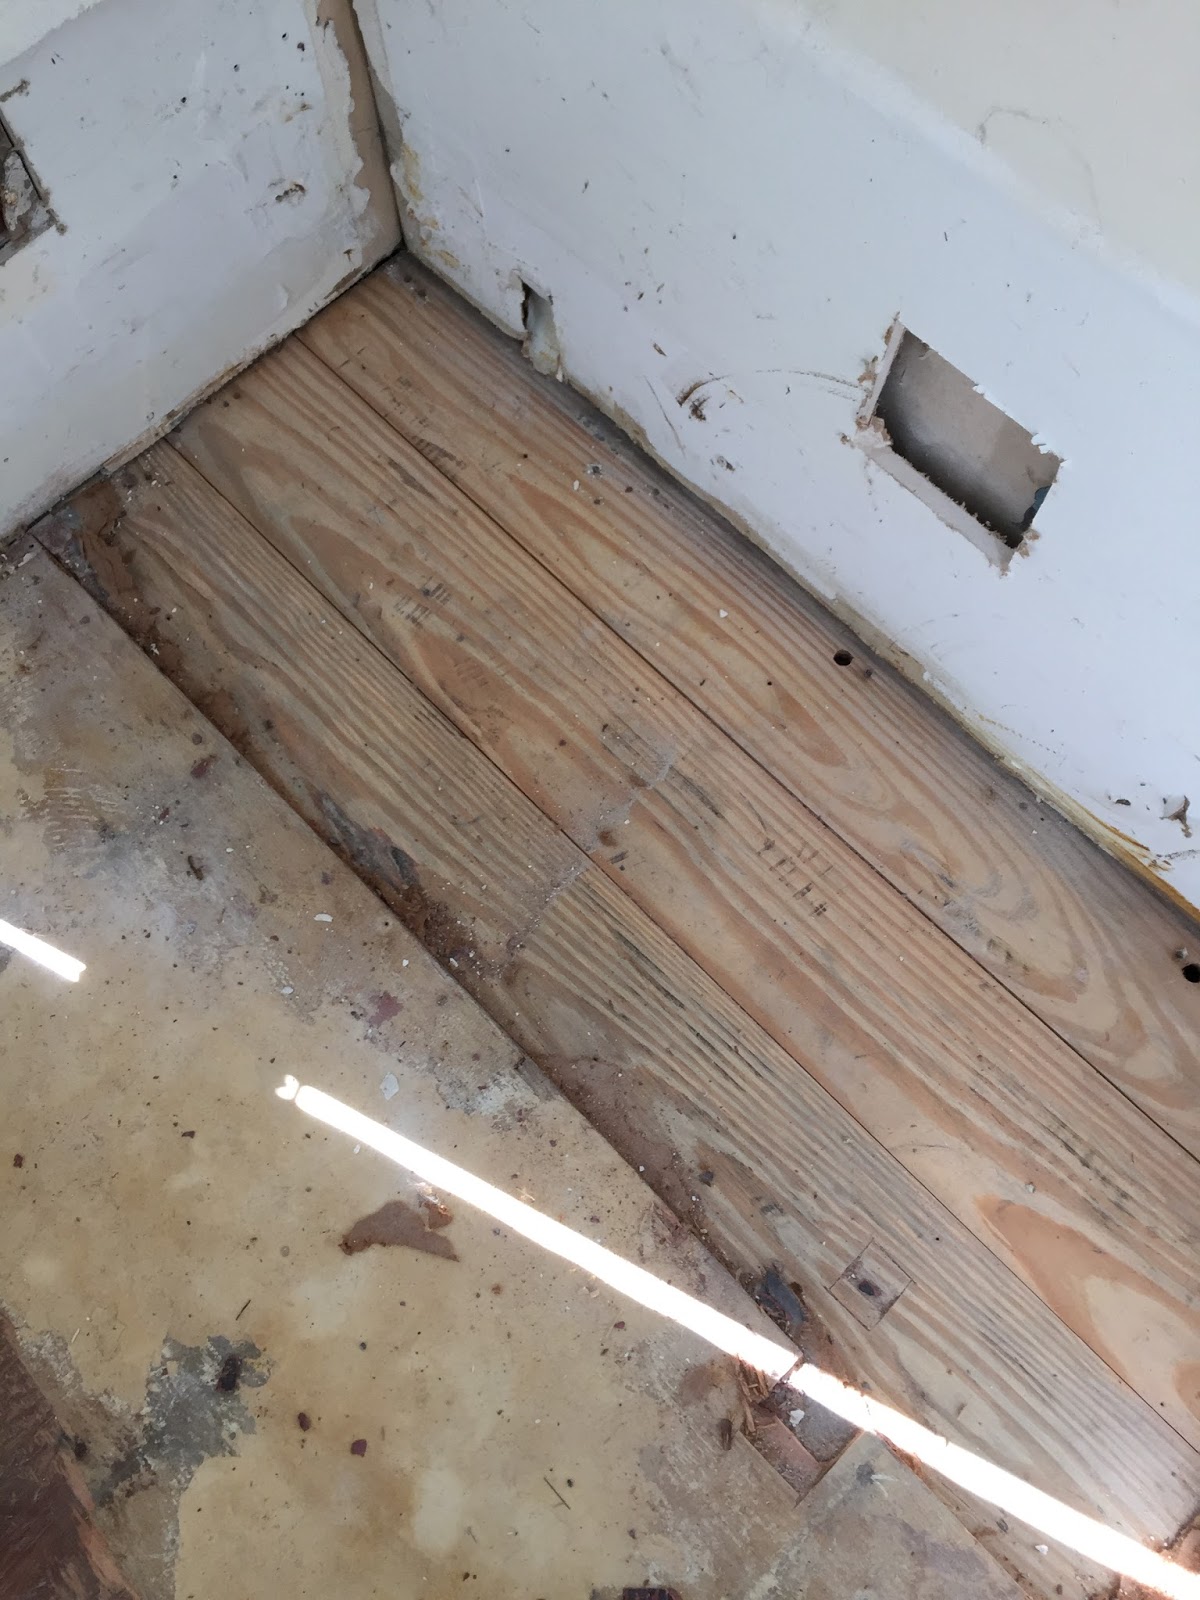
Underneath the linoleum (that matched the kitchen flooring we found during our demo there) we found this PERFECT condition tongue and groove subfloor. We kept thinking it had to be new. But it couldn't be because it had the 1940's linoleum ON it. Dave took up the subfloor and numbered it. We worked together to pull out all the nails and saved it to use again. We discovered that there had been an attempt at insulating under the floor with the fluffy insulation you put in walls. It was soaked and laying on the ground. They had taken up a bit of floor under the boot bench and kind of shoved from there.


When Dave dropped the ceiling we found that the insulation there was also done in a slapdash manner. But I could finally envision my vaulted ceiling!!

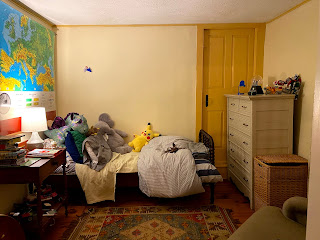
Here's where we are today!! The walls and ceiling have been meticulously insulated as well., and shiplapped. We lined the walls with shiplap for three reasons: 1) I love it and 2) I hate doing dry wall work and 3) it has its own insulation properties.

The ceiling is MDF beadboard.
We had electrical run so the front light and hall light here have their own switches, plus the interior hall light as well. We added a few outlets, too.


I've been caulking and sealing up allllll the cracks. Lots of podcast listening, folks.

This light fixture is from Target! It is part of the Beekman Boys line! It has a fabric wrapped cord. I MEAN!!!

Let me know what you think of our little adventure!!
xoxo jamie

Wow!! You guys did so much work! It's looks amazing and it's not even painted! 👏🏻👍🏻
ReplyDeleteThank you Londen!!! :-) :-) :-)
Delete